Please make sure that you have backed up your data before proceeding to the following steps.
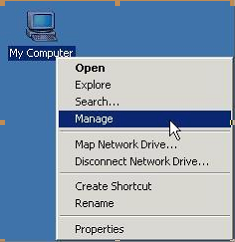
a. Right click on “My Computer,” and select “Manage.”
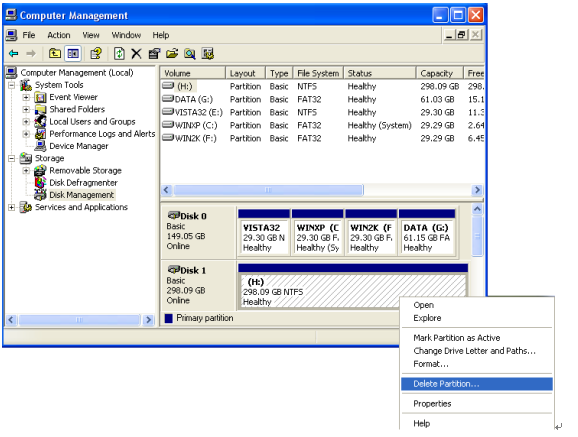
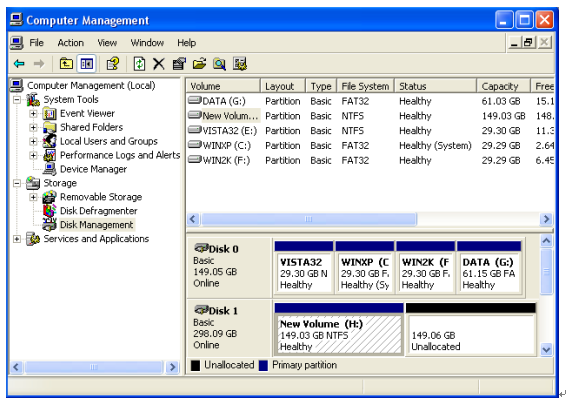
b. Select “Disk Management,” and then you’ll see a “Healthy’” disk. Right click on it, and select “Delete Partition.” You'll see an "Unallocated" disk.
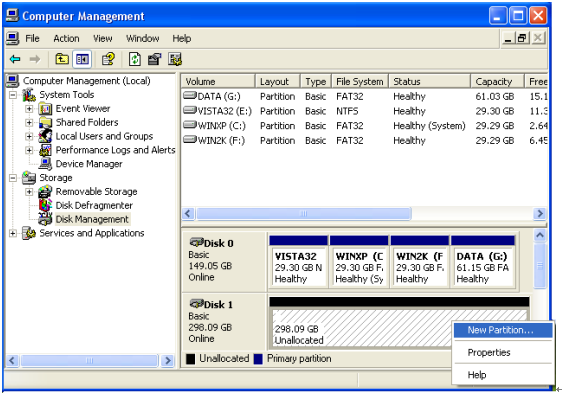
c. Right click on the "Unallocated" disk, and press “Create Partition.”
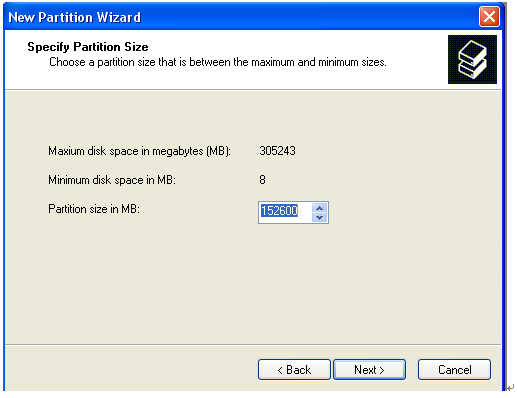
d. Follow the default settings, and press “Next” until “Specify Partition Size” appears. Set up the size for the first disk, and then press “Next.”
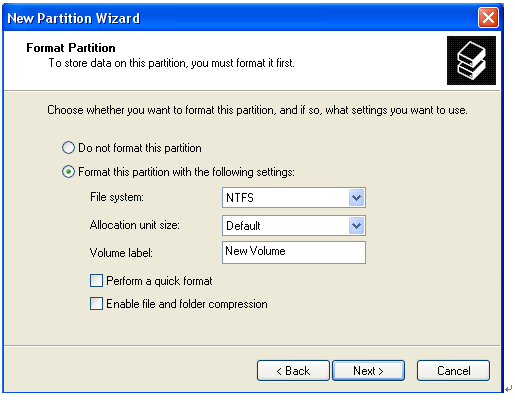
e. Follow the default settings, and press "Next" until "Format Partition" appears. Choose "Format this partition as the following settings," and press “Next.”
f. After completing "Create partition," the unconfigured disk will become a “Healthy” disk.
g. Follow the steps above to repartition other disks.